
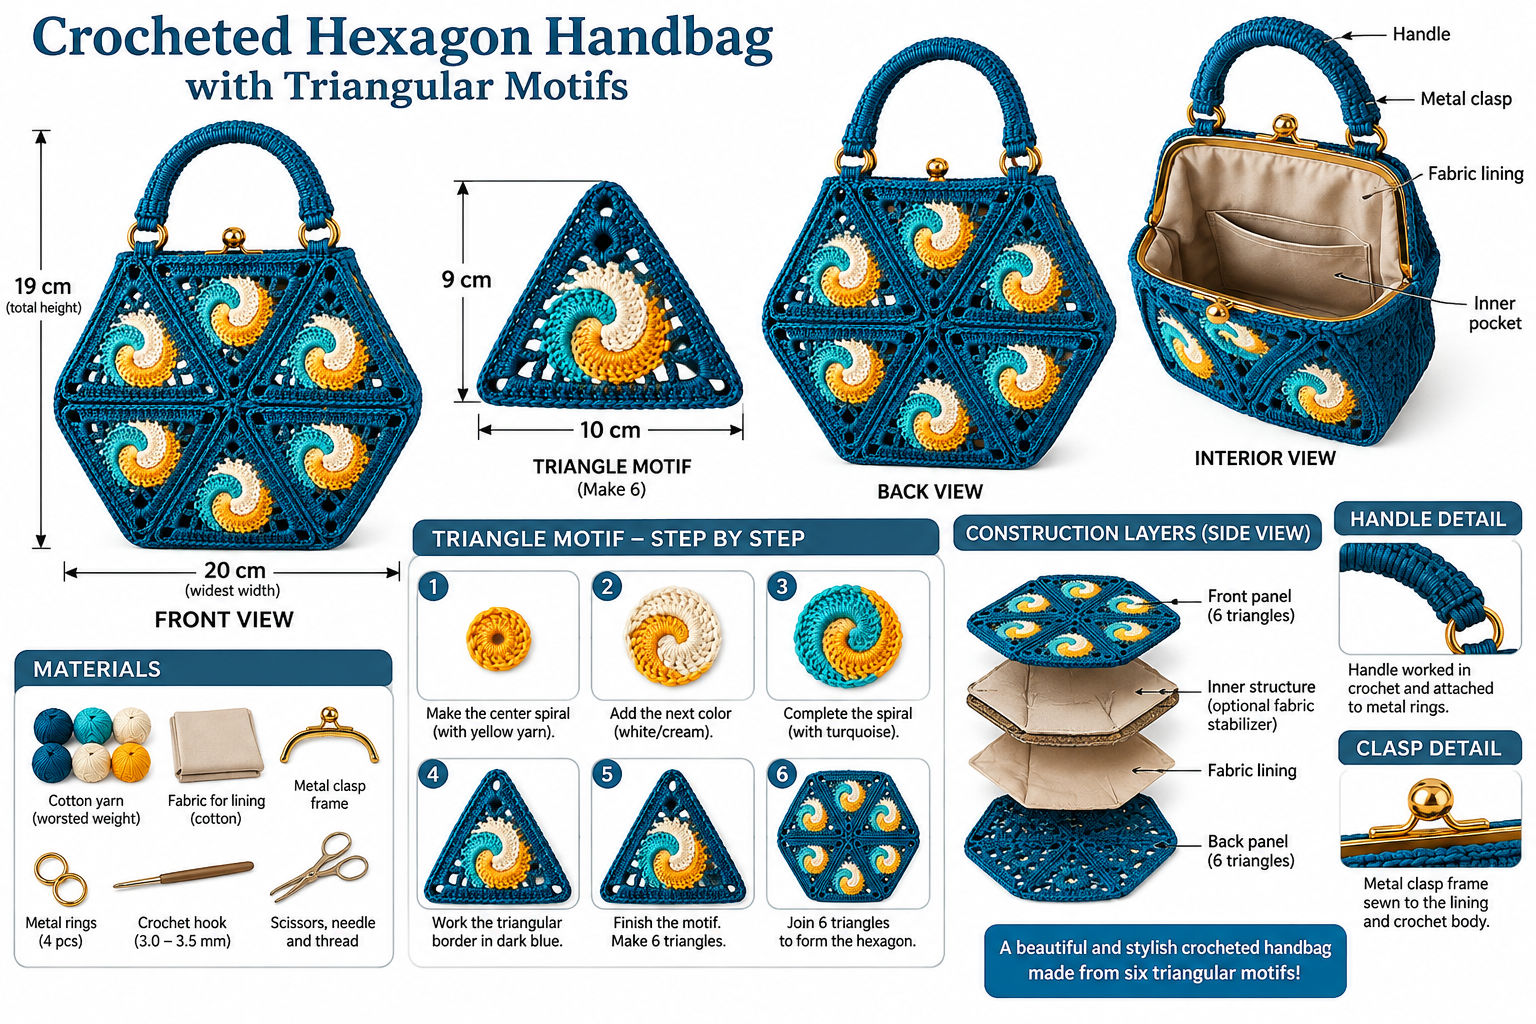
Overview & Inspiration
Welcome to the FreeCrochet community! Today we are exploring a stunning geometric accessory: the 3D triangular knit pattern for a bag.
Despite the word “knit” in its traditional name, this project is 100% crochet. It features striking triangular motifs with raised colorful spirals surrounded by textured openwork borders.
Materials & Tools Checklist
- Medium-weight yarn (cotton, cotton-blend, polyester cord, or firm synthetic) in three contrasting spiral colors and one main border color.
- Appropriate crochet hook for your chosen yarn.
- Yarn needle and scissors.
- Stitch markers.
- Optional bag hardware (rings, magnetic clasp, or metal frame) and lining supplies.
Pattern Stitches & Abbreviations
- ch = chain
- sl st = slip stitch
- sc = single crochet
- hdc = half double crochet
- dc = double crochet
- tr = treble crochet
- st = stitch
- sp = space
- rep = repeat
- inc = increase (work two stitches into the same stitch or space)
- ch-sp = chain space
Step-by-Step Instructions
- Create the Magic Ring: Start with an adjustable ring and distribute your starting stitches evenly. Divide the round mentally into three color sections (such as pink, yellow, and green) and place markers at the start of each.
- Form the Raised Spiral: Progressively increase stitch heights from sc to hdc to dc. Use strategic increases to make the colors bend into a spiral and keep carried yarn loose behind your work.
- Make the Triangle Frame: When the spiral measures 6 to 8 cm, join your border color. Identify three equidistant points and work corners (2 dc, ch 2, 2 dc) into each, filling the sides with dc and ch-1 spaces.
- Build Subsequent Rounds: Continue working around the triangle, repeating the corner sequence (2 dc, ch 2, 2 dc) in every corner space to build a strong triangular outline.
- Make a Test Motif: Crochet one complete sample triangle. For a medium handbag, aim for a size measuring approximately 14 to 18 cm from point to base before making the remaining motifs.
Assembly & Finishing
Once all your triangles are blocked and measured for consistency, fit them together like a geometric puzzle and join them firmly to form the bag’s body. Add an optional fabric lining and bag hardware for everyday durability.
Pro Tips for Best Results
- Always make a test triangle first to check your gauge and ensure your yarn holds the geometric shape.
- If your motif feels too flexible, drop down half a millimetre in hook size; if it is too stiff, go up 0.5 mm.
- Keep every triangle the exact same size rather than stressing over one fixed measurement, and block your pieces before joining.