
Overview & Inspiration
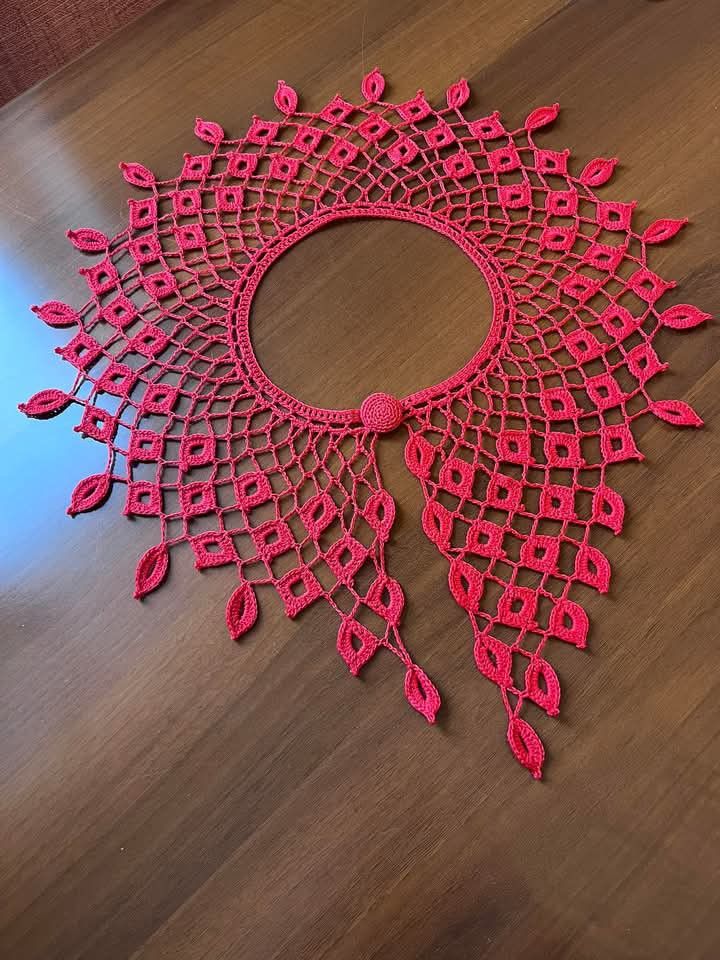
The Raspberry Lace Collar Pattern combines delicate openwork, geometric motifs, and graceful leaf details. Rendered in a rich raspberry-pink shade, this vintage-inspired accessory transforms any simple blouse or dress into a romantic handmade statement piece.
The design features a structured neckline that expands into a wide, dramatic circular lace fan. Finished with pointed botanical accents and an elegant button closure, it offers a lightweight drape that displays intricate stitches beautifully.
Materials & Tools Checklist
- 400–600 yards (365–550 m) Size 10 mercerized cotton thread in raspberry pink
- 1.75 mm crochet hook (2.0 mm hook optional for looser mesh)
- ½ inch (12 mm) decorative button
- Yarn needle, sharp embroidery scissors, and stitch markers
- Measuring tape, blocking mat, rustproof pins, and optional fabric starch
Pattern Stitches & Abbreviations
- US Abbreviations: ch (chain), sc (single crochet), dc (double crochet), tr (treble crochet), sl st (slip stitch), sp (space), st (stitch).
- Chain Space (ch-sp): Opening created by working chain stitches between posts.
- Picot Stitch: Ch 3, sl st into the first chain to create a decorative point.
- Treble Crochet (tr): Yarn over twice, insert hook, yarn over and pull up loop, [yarn over, pull through 2 loops] 3 times.
Step-by-Step Instructions
- Foundation Neckline: Using the 1.75 mm hook, ch 121. Row 1: Sc in 2nd ch from hook and in each ch across (120 sc). Ch 1, turn. Rows 2–3: Sc in each st across (120 sc). Ch 1, turn.
- Openwork Mesh (Row 4): Ch 5 (counts as 1 dc + ch-2 sp). Skip 2 sts, *dc in next st, ch 2, skip 2 sts; repeat from * across. Turn.
- Mesh Expansion (Row 5): Ch 5 (counts as 1 dc + ch-3 sp). *Dc in next dc, ch 3; repeat from * across. Turn.
- Mesh Expansion (Row 6): Ch 6 (counts as 1 dc + ch-4 sp). *Dc in next dc, ch 4; repeat from * across. Turn. Lay flat to check curvature.
- Diamond Motifs (Make 4): Ch 6, sl st to first ch to form ring. Round 1: Ch 1, *1 sc in ring, ch 3; repeat from * 3 more times, sl st to first sc to join. Fasten off.
- Leaf Border & Button Loop: Attach thread to the top right neck edge and ch 5 to create a button loop. Work pointed picot leaf motifs across the outer mesh edge. Fasten off.
Assembly & Finishing
Sew the motif diamonds evenly onto the mesh openings using a yarn needle and matching thread. Weave in all loose ends, sew the ½-inch button opposite the neck loop, and wet-block the collar using rustproof pins to open up the geometric lace details.
Pro Tips for Best Results
- Maintain Consistent Tension: Fine mercerized cotton highlights stitch inconsistencies, so keep your yarn tension steady during openwork rows.
- Pin-Block Thoroughly: Wet blocking with rustproof pins is critical to open the mesh and shape the outer leaf points sharply.
- Customize Fit Easily: Adjust your starting chain in multiples of 3 + 1 to effortlessly resize the neckline circumference.
Raspberry Lace Collar Pattern – Printable PDF Pattern
Download the clean, printer-friendly PDF to work on your project anywhere offline.