
Overview & Inspiration
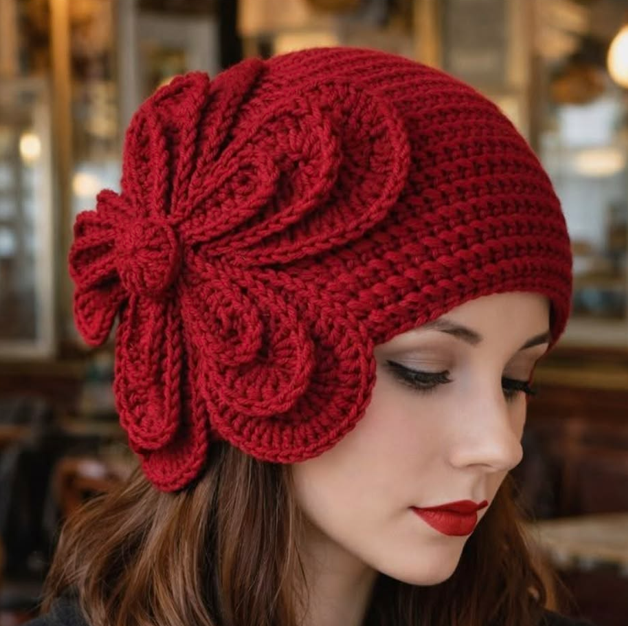
Welcome to the FreeCrochet community! The Crochet Beanie with Flower Pattern combines practical warmth with a gorgeous textured design, finished with a stunning layered side flower.
Using standard U.S. terminology, this project breaks down easily into manageable sections from crown to brim. It is designed to fit adult head sizes comfortably while giving you a polished, boutique-style accessory.
Materials & Tools Checklist
- 180 to 250 grams of medium-weight (worsted) yarn
- Crochet hook sized 4.5 mm to 5.5 mm
- Scissors and a yarn needle
- Stitch markers and a flexible measuring tape
Pattern Stitches & Abbreviations
- ch: chain
- sl st: slip stitch
- sc: single crochet
- hdc: half double crochet
- dc: double crochet
- tr: treble crochet
- st / sts: stitch / stitches
- inc / dec: increase / decrease
- BLO: back loop only
- FPdc / BPdc: front / back post double crochet
- FO: fasten off
Step-by-Step Instructions
- Crown Setup: Start with a magic ring. Ch 2, work 10 dc into the ring, and join with a sl st (10 sts). Pull the center firmly closed without distorting the stitches.
- Crown Expansion: Round 2: Ch 2, work 2 dc in each st around, join (20 dc). Round 3: Ch 2, repeat (1 dc in next st, 2 dc in next st) around (30 sts). Round 4: Repeat (1 dc in each of next 2 sts, 2 dc in next st). Round 5: Repeat (1 dc in each of next 3 sts, 2 dc in next st), continuing this pattern to grow the flat crown.
- Hat Body: Once the crown reaches a diameter roughly equal to your target circumference divided by 3.14 (e.g., ~17.2 cm for a 54 cm head), stop increasing. Work 1 dc in each st around until the hat measures 18 to 20 cm from the top center.
- Brim & Texture: Ch 2, then alternate (FPdc, BPdc) across the round for 3 to 5 rounds to create a flexible ribbed edge. Alternatively, work hdc in BLO for neat horizontal ridges. FO and weave in ends.
- Flower Accent: Start the flower with a magic ring and ch 1, work 8 sc into the ring, and join. Create the first petal layer by repeating: (sl st in next st, ch 2, 3 dc in same st, ch 2, sl st) around.
Assembly & Finishing
Securely attach your finished layered crochet flower to the side of the beanie using your yarn needle. Weave in all remaining yarn tails on the inside of the hat for a clean, professional finish.
Pro Tips for Best Results
- Always make a gauge swatch before starting to prevent a hat that is too tight or loose.
- Try the beanie on during the body-working stage to check the fit and adjust with a decrease round if needed.
- Use stitch markers to track the beginning of your rounds, especially when working in a continuous spiral.
📄
Crochet Beanie with Flower Pattern – Printable PDF Pattern
Download the clean, printer-friendly PDF to work on your project anywhere offline.