
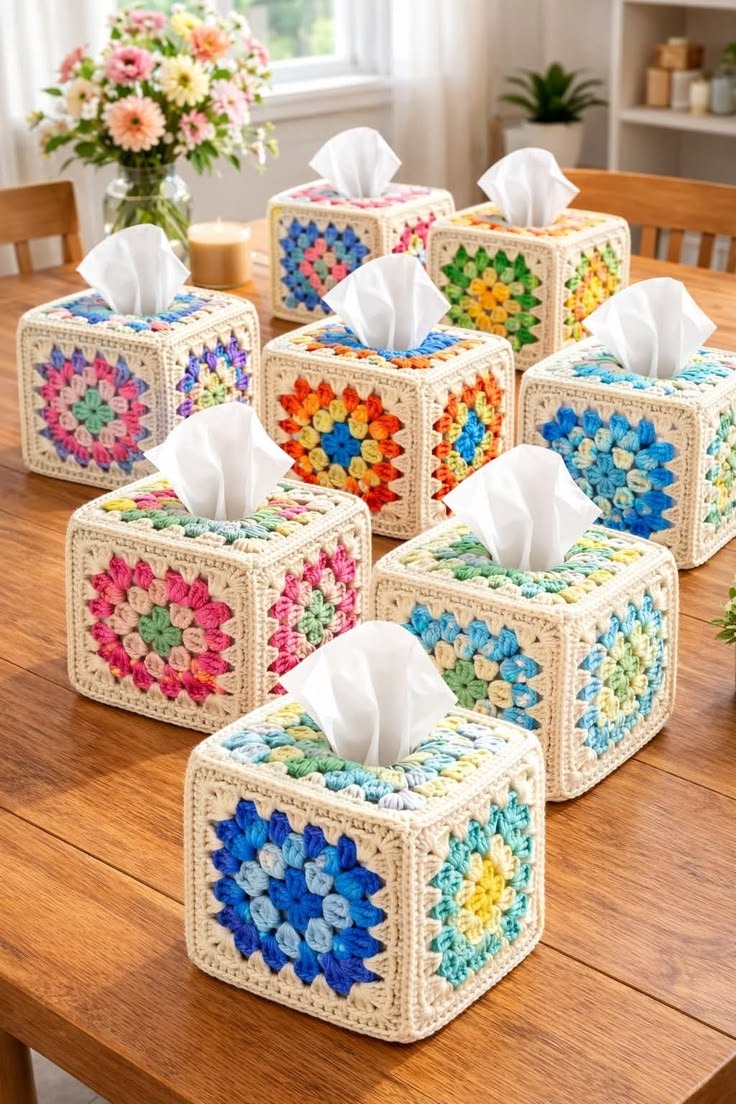
Overview & Inspiration
Welcome to the FreeCrochet community! The Crochet Granny Square Tissue Box Cover Pattern is a gorgeous way to blend traditional motifs with a functional home decor accessory.
This project transforms an ordinary box into a cheerful, vintage, or modern handmade piece. It is also an ideal stash-buster for using up leftover yarn scraps.
Materials & Tools Checklist
- Medium-weight cotton or cotton-blend yarn (multiple contrast colors plus one main neutral shade)
- Crochet hook sized 4 mm to 5 mm
- Tapestry needle
- Scissors
- Measuring tape
- Stitch markers (optional)
Pattern Stitches & Abbreviations
- ch: chain
- sl st: slip stitch
- sc: single crochet
- dc: double crochet
- st / sts: stitch / stitches
- sp / ch-sp: space / chain space
- rnd: round
- rep: repeat
Step-by-Step Instructions
- Measure the Box: Measure your tissue box from side to side, front to back, and top to bottom. Add 0.5 to 1 inch of ease for a comfortable, non-stretching fit.
- Test the Gauge: Crochet a sample granny square and measure it after shaping (e.g., a 4-inch square). Adjust hook size or rounds if needed to match your tissue box dimensions.
- Rnd 1 (Center): Make a slip knot and ch 4, join with a sl st to form a ring (or use a magic ring). Ch 3 (counts as 1 dc), work 2 dc into ring, ch 2. Work [3 dc, ch 2] three times into ring. Join with a sl st to top of beg ch-3 (four 3-dc groups and four ch-2 corners total).
- Rnd 2: Attach new color in any corner space. Ch 3, work 2 dc, ch 2, 3 dc in same corner. Ch 1, *[3 dc, ch 2, 3 dc] in next corner, ch 1; rep from * around. Join with a sl st.
- Rnd 3: Attach new color in any corner. Ch 3, 2 dc, ch 2, 3 dc in corner. Ch 1, work 3 dc in side ch-1 space, ch 1. *Work [3 dc, ch 2, 3 dc] in corner, ch 1, [3 dc in side space, ch 1] across to next corner; rep from * around. Join with a sl st.
- Expand Motifs: Continue adding rounds using this same logic ([3 dc, ch 2, 3 dc] in corners, 3 dc in side spaces separated by ch-1) until your squares reach the required size for your panels.
Assembly & Finishing
Arrange your finished squares around the measured tissue box, leaving an opening for the tissues on top. Seam the panels together neatly from the wrong side using your tapestry needle and neutral yarn, then weave in all remaining ends.
Pro Tips for Best Results
- Maintain consistent yarn tension to ensure all individual granny squares stay even and fit together seamlessly.
- Always test your first completed sample motif against the actual tissue box before crocheting the rest of the squares.
- Use a neutral shade like cream or beige for your final rounds and borders to tie all the colorful squares into a cohesive palette.
📄
Crochet Granny Square Tissue Box Cover Pattern – Printable PDF Pattern
Download the clean, printer-friendly PDF to work on your project anywhere offline.